For the general features, advantages, and disadvantages of the Hobie Mirage Revolution see the general features page.
As described on the Hobie Mirage Revolution general features page the mirage drive drops through the boat and the flippers extend into the water. When mounting a transducer it is important to place the transducer such that the when extended the mirage drive flippers do not impinge on the transducer sound cone.
![]()
A typical transducer sound cone is 60 degrees. The turbo flippers extend 16" below the hull. With basic trigonometry we can calculate that the transducer must be at least 9.25" from the edge of the flippers. If the transducer is mounted just forward or just aft of the mirage drive hull cut out, when the flippers are extended they will be in the transducer cone. To clear the flippers I chose to mount the transducer just aft of the crotch hatch. This places the transducer under the seat, near the center of the boat.
The basic design of this type of transducer mount is a closed-cell foam "doughnut" roughly the shape of the transducer. This "doughnut" is glued to the inside bottom of the hull with a generous, contiguous bead of Marine Goop. The foam doughnut is then filled with fresh or salt water and the transducer press-fit into the center of the foam doughnut until contact is made with the hull. This creates a continuous acoustic connection from the transducer to the water outside the hull.
The water surrounding the transducer will need to be replaced at the start of each trip, and perhaps more often depending on boat handling, tightness of press-fit, sea conditions, and evaporation. Because of this, various substances are occasionally used as a substitute for water, including petroleum jelly and grease. This installation will employ grease.
For the installation you will require:
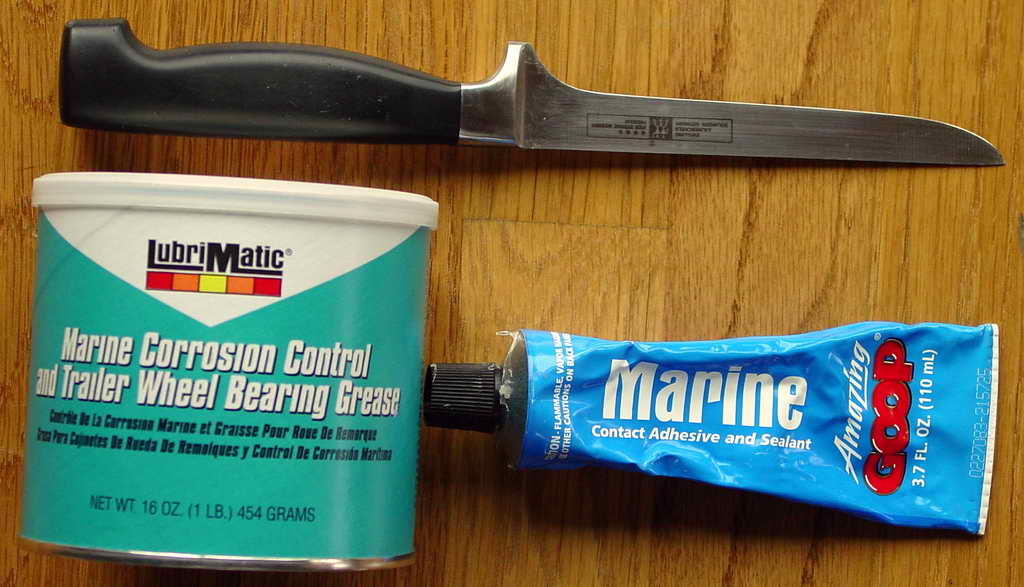
![]()
However, after about a year the preformance became flakey, providing a good bottom return with bouts of virutally no bottom return. Remounting with new grease provided performance for a while then succumbed to same problem.
Remounted with Duct Seal. See: Transducer in putty